
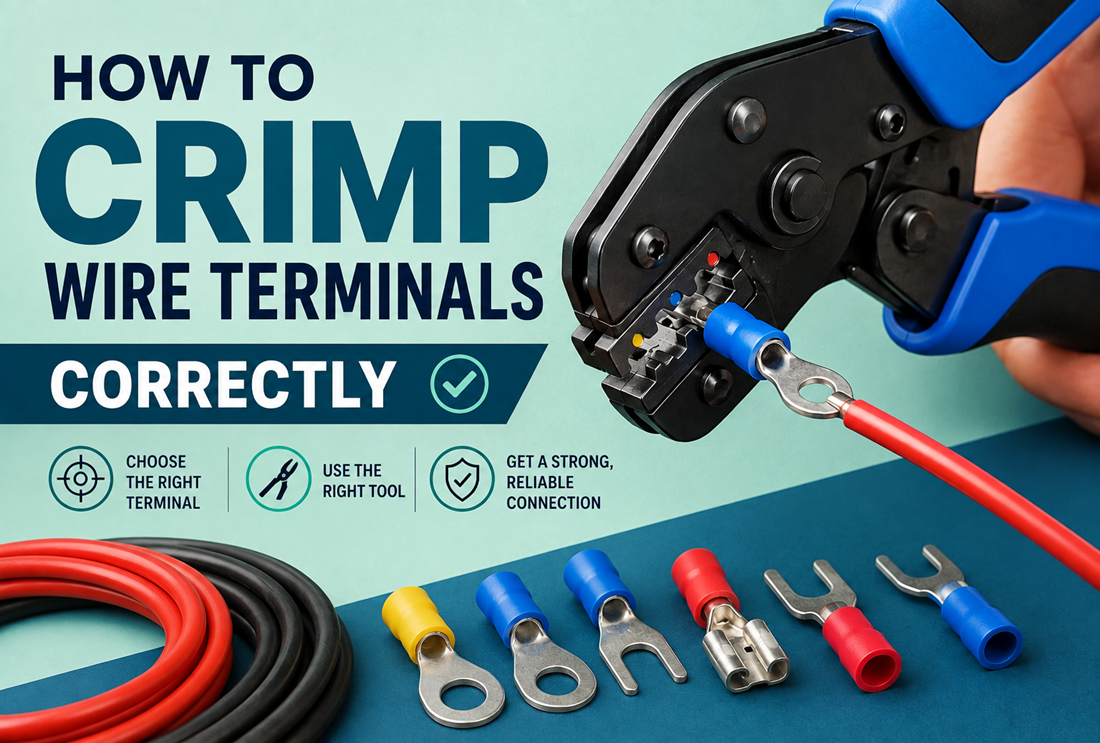
A good crimp is the difference between a connection that lasts for years and one that overheats, works loose, or fails on the road. Crimping looks simple — squeeze a terminal onto a wire — but the details decide whether the joint is gas-tight and mechanically strong or just barely holding on.
This guide walks through the whole process: the tools you need, how to pick and size a terminal, how to strip and insert the wire, how to make the crimp, and how to check your work. It also covers the most common mistakes and a troubleshooting table so you can fix a bad crimp before it becomes a problem.
Quick answer: the crimping process in six steps
- Choose the right terminal for the connection and match it to your wire gauge.
- Strip the correct length of insulation from the wire.
- Insert the conductor fully into the terminal barrel.
- Position the terminal in the matching slot of the crimp tool.
- Crimp firmly until a ratcheting tool releases (or the crimp is fully formed).
- Inspect and pull-test the finished connection.
Do those six things with the correct tool and terminal, and you’ll get a reliable crimp nearly every time.
What is crimping?
Crimping is joining a wire and a terminal by compressing the terminal’s metal barrel tightly around the conductor. The tool deforms the barrel so it grips the wire strands, forming a connection that is both mechanical (it holds physically) and electrical (metal-to-metal contact carries current).
Done correctly, a crimp creates a gas-tight joint — the metal surfaces press together so tightly that air and moisture can’t get in to corrode the contact. That’s why a proper crimp can outperform a hasty solder joint for many wiring jobs, especially where vibration is a factor.
Why proper crimping matters
A bad crimp causes problems that are hard to trace later:
- High resistance at a loose joint generates heat and wastes power.
- Intermittent connections cause flickering lights, dropouts, and gremlins.
- Mechanical failure — the wire pulls out under load or vibration.
- Corrosion creeps into a loose crimp and slowly kills the connection.
Because these failures often show up weeks or months later, it pays to crimp correctly the first time.
Tools required
- A crimping tool matched to your terminal type. Insulated, non-insulated, and specialty terminals each use a different die profile.
- Ratcheting crimpers apply consistent force and won’t release until the crimp is complete — the easiest way to get repeatable results.
- Manual (non-ratcheting) crimpers work but rely on your technique and hand pressure.
- Wire strippers sized for your wire gauge.
- Wire cutters for clean cuts.
- A heat gun if you’re using heat-shrink terminals.
- Optional: a small tug or a calibrated pull-tester to check the finished crimp.
Match the tool to the terminal. A crimper meant for insulated terminals won’t form a non-insulated terminal correctly, and vice versa.
Choosing the correct terminal
Start by deciding how the connection attaches, then match the size. Common terminal types and their differences:
- Insulated terminals — have a colored plastic/nylon sleeve. Crimp them with an insulated-terminal die that compresses the sleeve and barrel together.
- Non-insulated terminals — bare metal. Crimp with a die that forms the open barrel (often with a defined seam orientation). Add your own insulation or heat-shrink after.
- Heat-shrink terminals — insulated with adhesive-lined heat-shrink; crimp first, then apply heat to seal against moisture.
- Butt connectors — join two wires end to end; crimp each side of the barrel separately. See the TIESELX Insulated Butt Connectors.
- Ring terminals — closed loop for a bolted joint; crimp the barrel, attach the loop over a stud.
- Spade terminals — open fork or push-on blade; crimp the barrel the same way. The TIESELX Insulated Spade Connectors are a common example.
The barrel is crimped the same basic way across these types — the difference is the die profile and how the terminal attaches on the other end. Always follow the terminal manufacturer’s guidance, because the correct method can vary by design.
Matching terminal size to wire gauge
The terminal barrel must fit your conductor. Too large and it won’t grip the strands; too small and the wire won’t seat fully.
Insulated terminals commonly follow this color convention:
| Sleeve color | Common wire-gauge range* |
|---|---|
| Red | ~22–16 AWG |
| Blue | ~16–14 AWG |
| Yellow | ~12–10 AWG |
*This is a common convention, not a universal standard. The exact acceptable range depends on the terminal manufacturer — always confirm the rated wire range on the packaging before crimping. For a deeper look at matching wire to terminal, see the wire-gauge and terminal-size guide in this series.
Step-by-step: how to crimp a wire terminal
Step 1 — Strip the wire correctly
Strip only as much insulation as the terminal barrel needs — typically enough to fill the barrel without a long section of bare wire sticking out. A common range is about 6–7 mm, but match it to the terminal. Use the correct stripper slot so you don’t nick or cut strands. Nicked strands weaken the connection.
Step 2 — Insert the conductor
Twist loose strands lightly if needed, then insert the bare conductor fully into the barrel. The wire should reach the end of the barrel (or the internal wire-stop on a butt connector). For insulated terminals, the insulation should butt right up against the sleeve so no bare copper is exposed.
Step 3 — Position the terminal in the crimp tool
Place the barrel in the die slot that matches the terminal’s size and color. On many insulated crimpers the die slots are color-coded to match red, blue, and yellow terminals. For non-insulated terminals, orient the barrel seam as the tool requires.
Step 4 — Make the crimp
Squeeze firmly. With a ratcheting tool, keep squeezing until it releases on its own — that’s your signal the crimp is complete. With a manual tool, apply firm, full pressure. Crimp on the barrel, not on the insulation sleeve’s end or the ring/fork itself.
For butt connectors, crimp one side, then insert and crimp the second wire on the other side.
Step 5 — Inspect the connection
Look for:
– The barrel evenly compressed, not cracked or split
– No loose strands escaping the barrel
– Insulation seated against the terminal with no long exposed copper
– The terminal centered and straight on the wire
Step 6 — Pull-test
Give the wire a firm, steady pull (not a violent yank). The terminal should not move or slip off. This basic pull-test catches most weak crimps. If it moves, cut it off and redo it.
Step 7 — Seal, if using heat-shrink
For heat-shrink terminals, apply even heat with a heat gun until the sleeve shrinks tight and the adhesive flows slightly at the edges. Don’t scorch it. Add tubing from the TIESELX Heat Shrink Tubing Kit where extra sealing is needed.
Common crimping mistakes
- Wrong terminal size for the wire — the top cause of weak crimps.
- Using the wrong die/tool — an insulated die on a non-insulated terminal (or vice versa) won’t form correctly.
- Stripping too much or too little — long bare copper invites shorts; too little means poor contact.
- Nicking strands while stripping — reduces strength and current capacity.
- Crimping in the wrong spot — on the sleeve edge or the ring instead of the barrel.
- Under-crimping — a loose barrel that pulls off or overheats.
- Over-crimping — cracking the barrel or cutting strands with too much force or the wrong die.
- Skipping the pull-test — the easiest quality check, often skipped.
Troubleshooting table
| Problem | Possible cause | What to do |
|---|---|---|
| Wire pulls out of the terminal | Barrel too large, under-crimped, or not fully inserted | Use the correct terminal size, insert fully, re-crimp with proper force |
| Crimp feels loose or wobbly | Wrong die slot or insufficient pressure | Match the die to the terminal size; use a ratcheting crimper |
| Barrel cracked or split | Over-crimped or wrong die | Re-do with the correct die and a complete but not excessive crimp |
| Strands sticking out of the barrel | Too much insulation stripped or frayed strands | Trim, twist strands, strip the correct length, re-crimp |
| Connection gets warm in use | High resistance from a poor crimp | Cut out and replace the terminal; verify wire gauge and terminal match |
| Terminal spins on the wire | Barrel not compressed enough | Re-crimp; if it still spins, replace the terminal |
| Heat-shrink won’t seal | Not enough heat or wrong sleeve | Apply even heat until it shrinks and adhesive flows |
When to replace a poorly crimped terminal
Don’t try to “fix” a bad crimp by re-squeezing it — the barrel is already deformed. Instead:
- Cut off the terminal (and any damaged wire end).
- Re-strip fresh, undamaged wire.
- Crimp a new terminal of the correct size.
Replace any terminal that failed a pull-test, shows a cracked barrel, ran warm in service, or has visible corrosion.
Safety guidance
- Never work on energized circuits. Disconnect the battery or power source before crimping or servicing wiring.
- For household AC wiring, or any work you’re unsure about, consult a licensed electrician and follow local codes.
- Wear eye protection when cutting and stripping wire.
- Use terminals and tools rated for your application, and follow the manufacturer’s instructions — the correct crimping method depends on the terminal design.
Frequently asked questions
How do I know if my crimp is good?
Inspect it and pull-test it. The barrel should be evenly compressed with no cracks, no loose strands, and the insulation seated against the terminal. Then give the wire a firm, steady pull — a good crimp won’t slip or move.
Can I use pliers instead of a crimping tool?
It’s not recommended. Pliers don’t form the barrel evenly and usually leave a loose, high-resistance joint. A proper crimping tool — ideally a ratcheting one — is the reliable way to get a gas-tight crimp.
Do I need to solder after crimping?
Usually no. A correct crimp is a complete connection on its own. Adding solder can even make some joints brittle at the edge of the solder. Follow the terminal manufacturer’s guidance for your application.
How much insulation should I strip?
Enough to fill the barrel without leaving long bare copper exposed — often around 6–7 mm, but match it to the specific terminal. The insulation should meet the terminal sleeve with no gap of bare wire.
Why does my crimped connection get warm?
Warmth usually points to high resistance from a poor crimp or a terminal-to-wire size mismatch. Cut it out, verify the terminal matches the wire gauge, and re-crimp with the correct tool.
Is crimping better than a wire nut or twisting wires?
For low-voltage and automotive wiring, a proper crimp is cleaner and more vibration-resistant than twisting and taping. Use the connector type suited to the job — a butt connector to splice, a ring or spade to terminate.
Conclusion
Crimping wire terminals correctly comes down to a few disciplines: pick the right terminal, match it to your wire gauge, strip the correct length, seat the wire fully, use the matching crimp tool, and always inspect and pull-test the result. Follow that routine and your connections will be strong, low-resistance, and reliable.
Stock the terminals and tools you need from the Wire Terminals & Connectors range, and once your connections are made, tidy the harness with zip ties and cable clips.